
Operation CHARNWOOD
began on 8 July, when the British I Corps with a reinforced strength of
115,000 men, supported by 656 guns and two armoured brigades, with over
350 tanks and specialized armoured (flails, flame-throwers, & AVREs)
opened its drive to Caen and the Orne River. At 0730 hours, the 3rd
British Division, on the east flank, had captured Lebisey, but the 59th
British Division, in the middle, was still struggling to win its initial
objectives of Galmanche, La Bijude, and St. Contest. The 3rd Canadian
Division, on the west flank, advance towards the small Norman village of
Buron, defended by the German 12.SS-Panzer Division Hitlerjugend
under the leadership of Standartenführer Kurt "Panzer"
Meyer, who watched the attack from a tower of the nearby ancient Abbaye
des Ardennes. Leading the Canadians’ advance was the 9th Brigade's
Highland Light Infantry, raised in Waterloo County, Ontario, for whom
this attack was to be their first major battle.
BB1 First Big Fight: Operation CHARNWOOD opened at 0730-hrs, the 3rd British Division had captured Lebisey, but the 59th British Division was still struggling to win its initial objectives of Galmanche, La Bijude, and St. Contest. Once more Buron would be attacked by the Canadians with St. Contest still in the hands of the German 12.SS-Panzer Division Hitlerjugend under the leadership of Standartenführer Kurt "Panzer" Meyer, who watched the attack from the towers of the nearby ancient Abbaye des Ardennes.
BB2
Smashing in the Door: On
the right flank, D Company, under Major Harry Anderson came under heavy
mortar, artillery, and machine-gun fire as it assaulted the ditch and
the positions immediately behind it. The fighting was heavy and
close-in, numerous times D- Company was pinned to the ground by the
intensive fire, only to get up and continue its advance went it let up,
or was quelled by the Sherbrooke's tanks, called up to aid them.
BB3 Haywire Communications: On the left flank, B Company, under the command of Captain Vince Stark, had orders to clear the eastern half of the village. B Company had managed to close up with the ditch and began to encounter heavy opposition from not only the anti-tank ditch, but positions directly behind it. In the face of heavy fire, B Company again and again charged the entrenched Hitler Youth, who were equipped with large numbers of automatic weapons..
BB4 Zoot Suit Boys: The Highland's B and D Companies struck the ditch and immediately came under heavy mortar, artillery, and machine-gun fire from positions in and close behind the ditch. Heavy fighting, at times close in with bayonet, knife, and bare fist, ensued as the Canadians fought to capture the ditch and the auxiliary position behind it; many Germans were killed and taken prisoners.
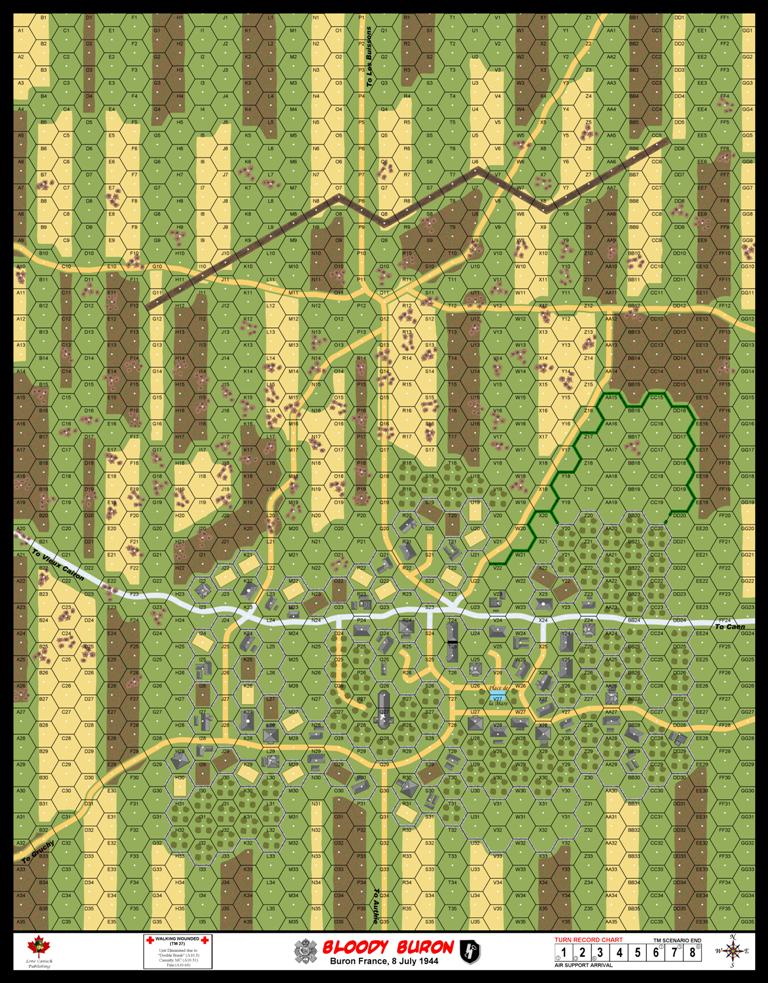
Crossing the Moro contains:
- one 30" x 24" map with one inch hexes
- Chapter: Bloody Buron Rules
- four ASL scenarios
- one Tactical Mission (aka Campaign Game)