
The 1st Canadian Infantry Division, having
captured Campobosso in late October, began withdrawing in late November,
bound for the Adriatic coast, where they were to replace a British
division that had been badly mauled in the crossing of the lower Sangro
River. The Canadians were
assigned the far right flank of the British Eighth Army, on the coast,
and given the task of driving northwards to capture the small port town
of Ortona. Before they could do that, however, they would have to cross
the heavily defended Moro River, about three-kilometres South of Ortona.
The Canadians' plan
called for the crossing the river and the securing of a bridgehead at
three points; on the right along the coast, the Hastings and Prince
Edward Regiment was to capture San Donato; in the centre, the Seaforth
Highlanders were to capture San Leonardo, and on the left flank, the
Princess Patricia’s Canadian Light Infantry was to capture Villa Rogatti
CM1 Half-Dressed & Bleary-Eyed: The Princess Patricia's Canadian Light Infantry (PPCLI), under the command of Lieutenant-Colonel Cam Ware launched their attack on Villa Rogatti at midnight on 5-6 December. Ware's plan called for the each of his four companies and his HQ, under the cover of darkness, to cross the Moro River, one at a time, and make their way up a narrow-wooded gully, attacking Villa Rogatti from the southeast.
CM2 Bucko!:The Patricias, under the cover of darkness, crossed the Moro River and made their way up a narrow-wooded gully approaching Villa Rogatti from the southeast. Led by their Company Commander, Major W. “Bucko” Watson, B Company, broke through the Germans' outer defences and broke through it and into the town.
CM3 That Damn Gun!: Morning skies over Villa Rogatti were clear and the sun's surprising warmth raised steam off the soggy clothing of German corpses scattered among the surrounding vineyards, olive groves, streets, backyards, and houses. The Panzergrenadiers had now recovered from the Patricias’ surprise attack the previous night that had caused them to lose the village. No German mortars and field guns started pounding the houses and streets while machine-gunners and grenadiers opened up from the dense cover of the surrounding farmlands.
CM4 Rukdeschel's Attack: For most of the day the Patricias had staved off repeated German attempts to retake Villa Rogatti. Lieutenant-Colonel Cam Ware had no sooner returned to his HQ, after personal leading a counterattack that threw back two Panzergrenadier companies from over running Major "Bucko" Watson and A Company; when at 1530 hours, B Company's, Captain Robertson signalled Ware that a German attack was coming his way. Robertson estimated that 70 infantrymen supported by nine Panzer IVs were preparing to attack his position on the west side of the village..
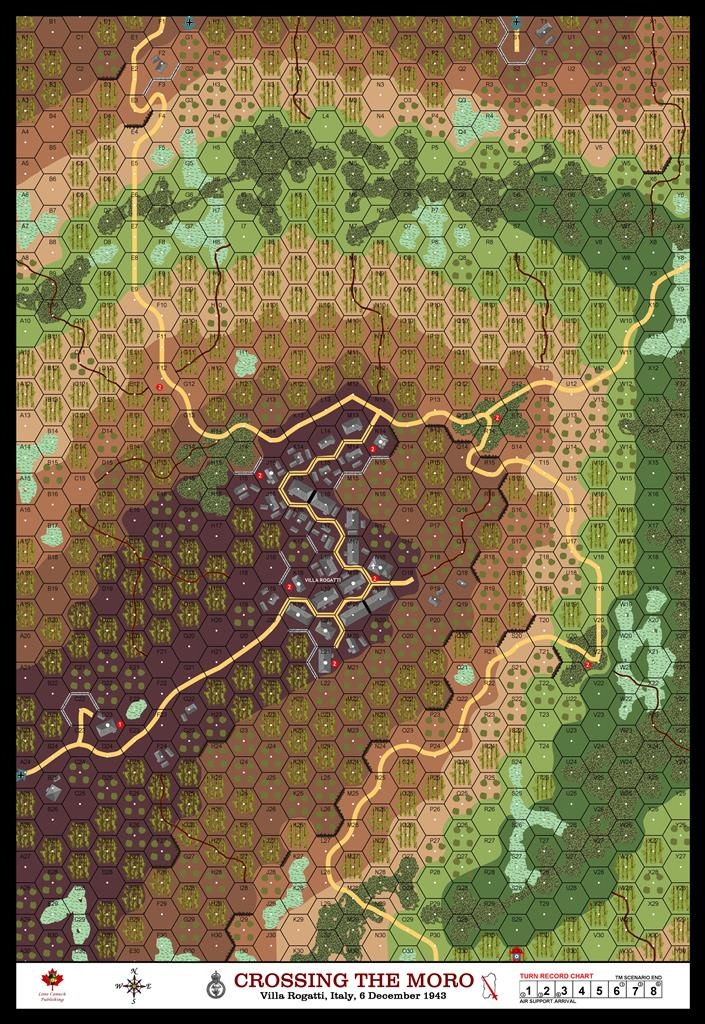
Crossing the Moro contains:
- one 33" x 22" map with one inch hexes
- Chapter: Crossing the Moro Rules
- four ASL scenarios
- one Tactical Mission (aka Campaign Game)